Subscriber Benefit
As a subscriber you can listen to articles at work, in the car, or while you work out. Subscribe NowCorn is one of summer’s simplest pleasures. That being said, it generates plenty of debate—how to pick it, how to clean it, how to cook it and how to eat it. I would wager to say that there aren’t many wrong answers to any of those questions—it’s more about what you prefer—but if you’re looking for a few tips to perfect your corn game, read on.
Picking. Given the current shopping restrictions at some farmers markets (preordering, only staff handling the produce) and pandemic-related etiquette in grocery stores, there will likely not be as much flexibility in terms of picking your preferred ears of corn. Handling and even peeling back the husk on lots of ears was never ideal—even in normal times.
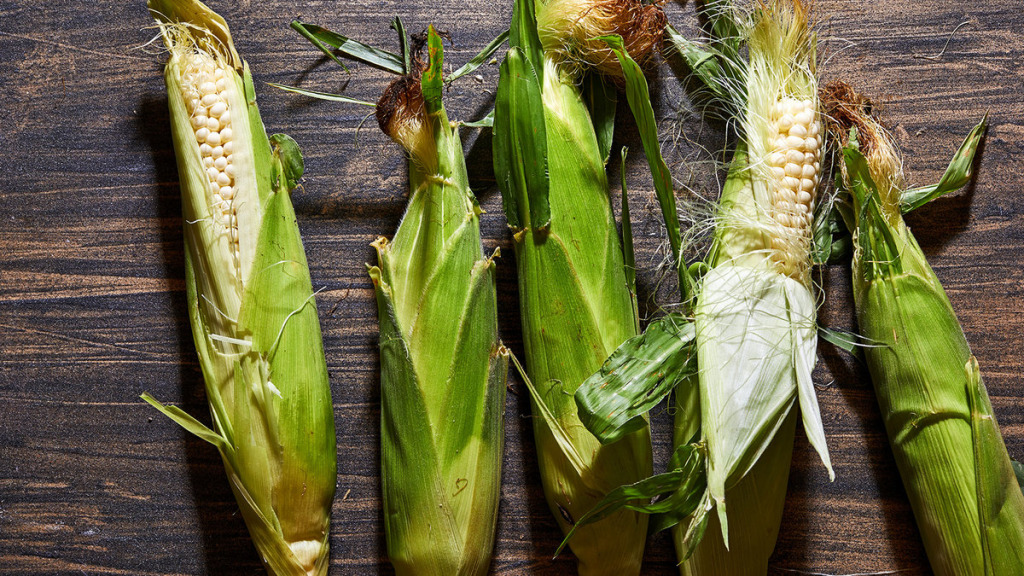
It’s still useful to keep a few things in mind. Chef, farmer and author Abra Berens says the husks should be closer to bright green, with perhaps a bit of yellowing near the tip of the cob. She also suggests looking at the silks. They naturally wither after pollination, but the drier they are toward the corn, the longer it has been off the stalk. Like a melon, an ear of corn should feel heavy for its size, which indicates it is juicy.
You may also be able to spot corn worm holes, and even if one decided to have a snack, you can often just cut off that end of the ear. “People seem to really freak out about corn worms,” says Berens, author of “Ruffage: A Practical Guide to Vegetables” (Chronicle Books, 2019). “They’re not going to hurt you.” I’m glad I kept that in mind when I found a giant one after cooking an ear this week, because after quickly hacking off the sketchy end, the corn was still delicious.
Berens says you shouldn’t be put off by dented or not fully formed kernels either, as those are more indicative of a pollination fluke (each silk is attached to a particular kernel). It may not be the perfect bite, although the rest of the corn should be fine. As far as colors go, white, yellow and bicolor are interchangeable in flavor.
Storing. Berens typically stores her corn at room temperature, as that’s how it’s most often displayed at the supermarket. “They do so much research on how to store stuff,” she says. Refrigerating is an option, especially for longer shelf life. Cook’s Illustrated notes that cool temperatures slow the conversion of sugar to starch (modern sweet corn has been bred to keep this slower, too), and the moist air of the fridge keeps the corn from drying out. It recommends stashing corn in the husk in a wet paper bag inside a plastic grocery bag when refrigerating.
Another option, recommended to me by Jeffrey Brecht, professor of horticultural sciences at the University of Florida’s Institute of Food and Agricultural Sciences: Sprinkle the corn with ice and store it in a plastic bag, getting rid of the water after the ice melts and replenishing it every so often. He says removing the husk first prevents the leaves from drawing moisture out of the corn.
Prepping. When I have to shuck corn, I don’t feel the need to do anything fancy. I peel back the husk and the silk all the way, gather them into a bundle and snap the stalk and everything else off together. Voila. Maybe there are a few stray silks, but they’re easily dealt with (or ignored). A vegetable brush and running water can help.
Cook’s Illustrated offers another strategy: Cut off the first few inches of the ear, just a few rows above the stalk, and microwave on high for 30 to 60 seconds. Hold the corn by the uncut end, shake and let the cob fall out. When you need to remove the kernels, take the advice of some of your fellow readers and put the narrow end of the cob into the center of a Bundt pan, which will catch them as they fall. If you end up with a lot of silks in the kernels, transfer the cobsto a bowl. Fill a separate bowl with water and then dip your hand in it. Run your hand over the kernels in a circle, allowing the silks to stick to your hand. Dip your hand back in the water to rinse it off. Repeat as needed.
There are ways to get even more out of your corn, too. You can save the silks, husk and stripped cobs to make this Corn Broth. You also can “milk” a stripped cob with the back of a knife (I prefer a smaller paring knife to reduce the likelihood of mishaps) to remove the flavorful starchy liquid that’s waiting to be used in soup, risotto and even ice cream (see: Salty Sweet Corn Ice Cream) or custard.
Cooking. I couldn’t have said it better than food writer and recipe developer Ali Slagle, who shared a tantalizing recipe for Corn and Chorizo Tacos: “The best method for cooking corn on the cob is a deeply personal matter best left to debate with relatives.” (Let’s not even get into whether corn needs butter. … No.) My favorite method is probably the easiest, at least for my current lifestyle. That would be microwaving the ears, husks and all. The kernels steam inside the husk, coming out plump, juicy and flavorful. It is easy to experiment: Less time for closer to raw, more time for cooked through. My sweet spot is about 4 minutes for one ear, 8 minutes for two and 9 minutes for three.
Berens says her go-to method is boiling, which she does for about 7 minutes. Another option she suggests is letting corn sit in just-boiled water without the heat, as you might for poached chicken or boiled eggs. This keeps the corn from overcooking. As to salting the water? Cook’s Illustrated recommends against it, finding that salt toughens the kernels.
Grilling is another popular method, and you have plenty of options—without husk, with husk, smoked and in foil (with or without ice cubes). Check out the full rundown here.
Of course, completely raw corn is a beautiful thing, too.
-—-

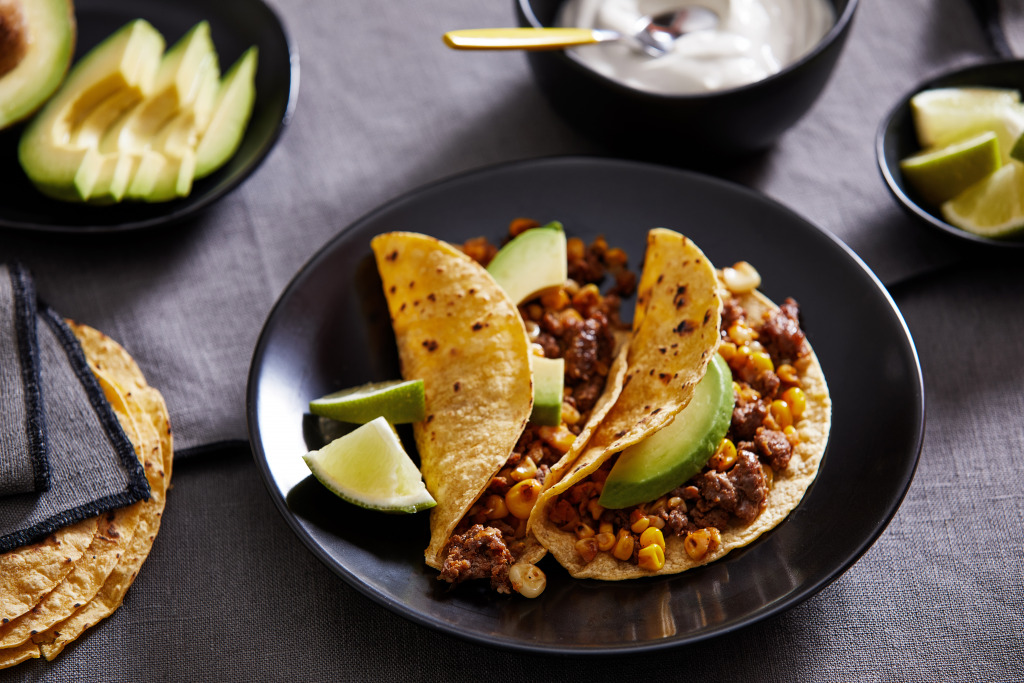
CORN AND CHORIZO TACOS
Spicy fresh chorizo provides the savory backdrop to sweet, caramelized corn. This from-the-skillet meal can also be done in a hot oven: Cook the kernels and chorizo together on a sheet pan until the chorizo is browned. Either way, the corn will be draped in the intensely seasoned chorizo fat and will need only something creamy, such as avocado or sour cream, and a hit of acid from a lime wedge to complete the taco.
Servings: 4 to 6 (2 tacos per serving)
Storage Notes: Refrigerate the meat and corn in an airtight container for up to 3 days.
Ingredients
2 tablespoons extra-virgin olive oil or a neutral cooking oil, such as canola
1 pound fresh chorizo, casings removed if necessary
4 cups fresh (from 4 to 5 ears) or frozen (about 20 ounces) corn kernels
3 scallions, thinly sliced, white and green parts separated
Kosher salt or fine sea salt
Freshly ground black pepper
8 to 12 six-inch corn tortillas, toasted (see NOTE)
Sliced avocado, for serving
Sour cream, for serving
Lime wedges, for serving
Directions
In a large cast-iron skillet or Dutch oven over medium-high heat, heat the oil until shimmering. Add the sausage and cook, stirring and breaking it up with your spoon, until browned, 5 to 8 minutes. Using a slotted spoon, transfer the sausage to a plate, leaving the fat behind.
Add the corn kernels and scallion whites to the skillet. Season to taste with salt and pepper and cook, undisturbed, until browned and starting to pop, 4 to 6 minutes. Stir and cook until the kernels are shiny and brightly colored, about 1 minute. Return the chorizo to the skillet and stir to combine. Remove from the heat. Spoon some filling onto a tortilla, then repeat to fill the rest of the tortillas.
Serve with the scallion greens, avocado or sour cream, and lime wedges for squeezing.
Note: To toast the tortillas, place them in a hot, dry skillet (cast iron is good) over medium to medium-high heat, or directly over the burner on about medium-low if you have a gas stove. Let the tortillas darken and even char in spots.
From recipe developer Ali Slagle.
Nutrition: Calories: 550; Total Fat: 36 g; Saturated Fat: 12 g; Cholesterol: 67 mg; Sodium: 994 mg; Carbohydrates: 34 g; Dietary Fiber: 4 g; Sugars: 6 g; Protein: 23 g.
—
Becky Krystal is a food writer for The Washington Post.
Please enable JavaScript to view this content.

